
Waiter...my Menu is all GUI!
I built a front end UI for my capability tests.
Background
As I ported my accelerometer test (the subject of my last post), I realised creating an app for each test on my Android phone was going to be problematic. When I originally built these tests as UWP apps for Windows Phone in Visual Studio, deployment was easy. It was cheaper in time and effort to just deploy a new app each time rather than building a UI and hosting them in a single app.
However deploying to UWP and Android in Godot has different overheads. It takes significantly more effort to configure the project, obtain signing certificates, and do the app signing. Having gone through the pain once I knew I didn’t want to spend time jumping through those hoops every time I created a new test app.
It was time to build myself a small UI to choose which test to run within the bounds of a single app, and a simple menu is perfect for this purpose.
Designing the Menu
Because the next capability test I will convert requires knowledge of Godot UI control nodes, exploring them now on something simple is a logical first step. A menu that fulfills my current need will show an app title, and a button for each test to choose from. Each button will show the title of the capability test it represents and an image representing what the test looks like when it’s running.
I decided to make the menu content dynamic so that updating it with each new test I build will be trivial. A data driven menu is the way to go in this case, so I created an array of dictionary objects with properties of name, thumbnail (image filepath) and path (scene filepath). This is the minimum data each button needs to render and run a test when pressed.
1 | var Apps = [ |
The data to define the app buttons on the menu
Scene Control
On each test I’ve built in Godot up to this point, I’ve configured the project’s main scene (the one that runs when you hit F5) to be the test I was actively working on. Now it was time to implement things properly; constructing a game root node with dynamic loading and unloading of child nodes, thereby changing the scene that is being displayed. When the app starts the game’s root node is pre-loaded with the Menu scene, and when a test is chosen in the menu the game will remove the Menu scene and add the scene of the chosen test.
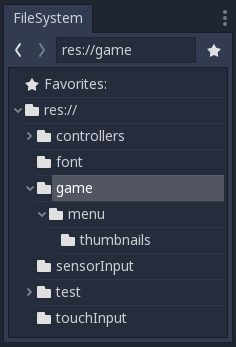
I created a separate game folder so that the implementation of the game logic (loading and unloading children etc) wouldn’t bleed into the implementation of each test. For the time being I kept my tests in their own folders directly under the res:// root folder, though it’s likely I’ll reorganise this to avoid clutter as I add more tests. Here’s how this looks on disk:
The Menu Scene
As stated earlier the Menu will show the app title and a button for each test. A left-aligned title with a nice big font will be at the top. In the remaining space underneath I will lay buttons out horizontally across the screen, wrapping to the next line when there are too many to fit. Some space around these pieces will let the UI breathe.
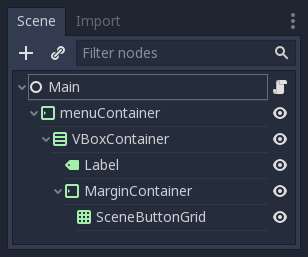
To achieve this I used a MarginContainer with some healthy margins to provide the breathing room. To that node I added a VBoxContainer containing a Label node for the app title and a GridContainer for the buttons. I put the GridContainer inside its own MarginContainer so I can specify additional space between the buttons and app title.
The SceneButton Scene
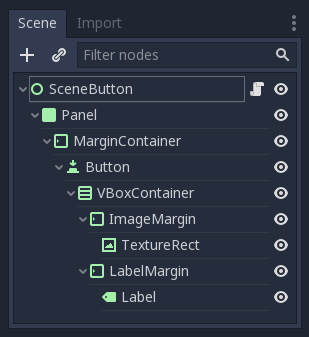
I designed each button to have a centred image at the top, the test name (title) centred horizontally at the bottom, and a border around them both for aesthetics. I used a Panel to give the illusion of a border, though it’s really just a big coloured box taking up the whole background. Inside that I created a Button node inside a MarginContainer for creating this border illusion. The Button node contains a TextureRect and Label node inside another VBoxContainer to achieve a vertical layout, and each is wrapped in its own MarginContainer to get the spacing just right.
I called this scene a SceneButton because it’s a generic button that defines which test scene the game will load when clicked.
Controlling Scene Loading with Signals
The SceneButton fire’s a pressed signal that is received by the game node when clicked, and it passes the filepath of the scene to load as a parameter. The SceneButton script connects to its internal Button node to detect the actual button press, and simply emits the pressed signal with the filepath that is configured when the button instance is created.
1 | extends Control |
Signals in the SceneButton (code edited for brevity)
Configuring the SceneButtons at Run Time
When the app loads and the game scene is ready, its script loops through the Apps array shown earlier and creates the instances of SceneButton. Each instance is populated with the properties of the scene it represents, and its pressed event is connected to an OnButtonPressed handler in the game.
1 | extends Node |
Instancing the SceneButtons (code edited for brevity)
Finally, the OnButtonPressed handler creates an instance of the scene that was passed from the clicked SceneButton, adds the instance to the game’s root node, and removes the Menu scene node.
1 | onready var MenuContainer = $menuContainer |
Handling a SceneButton press (code edited for brevity)
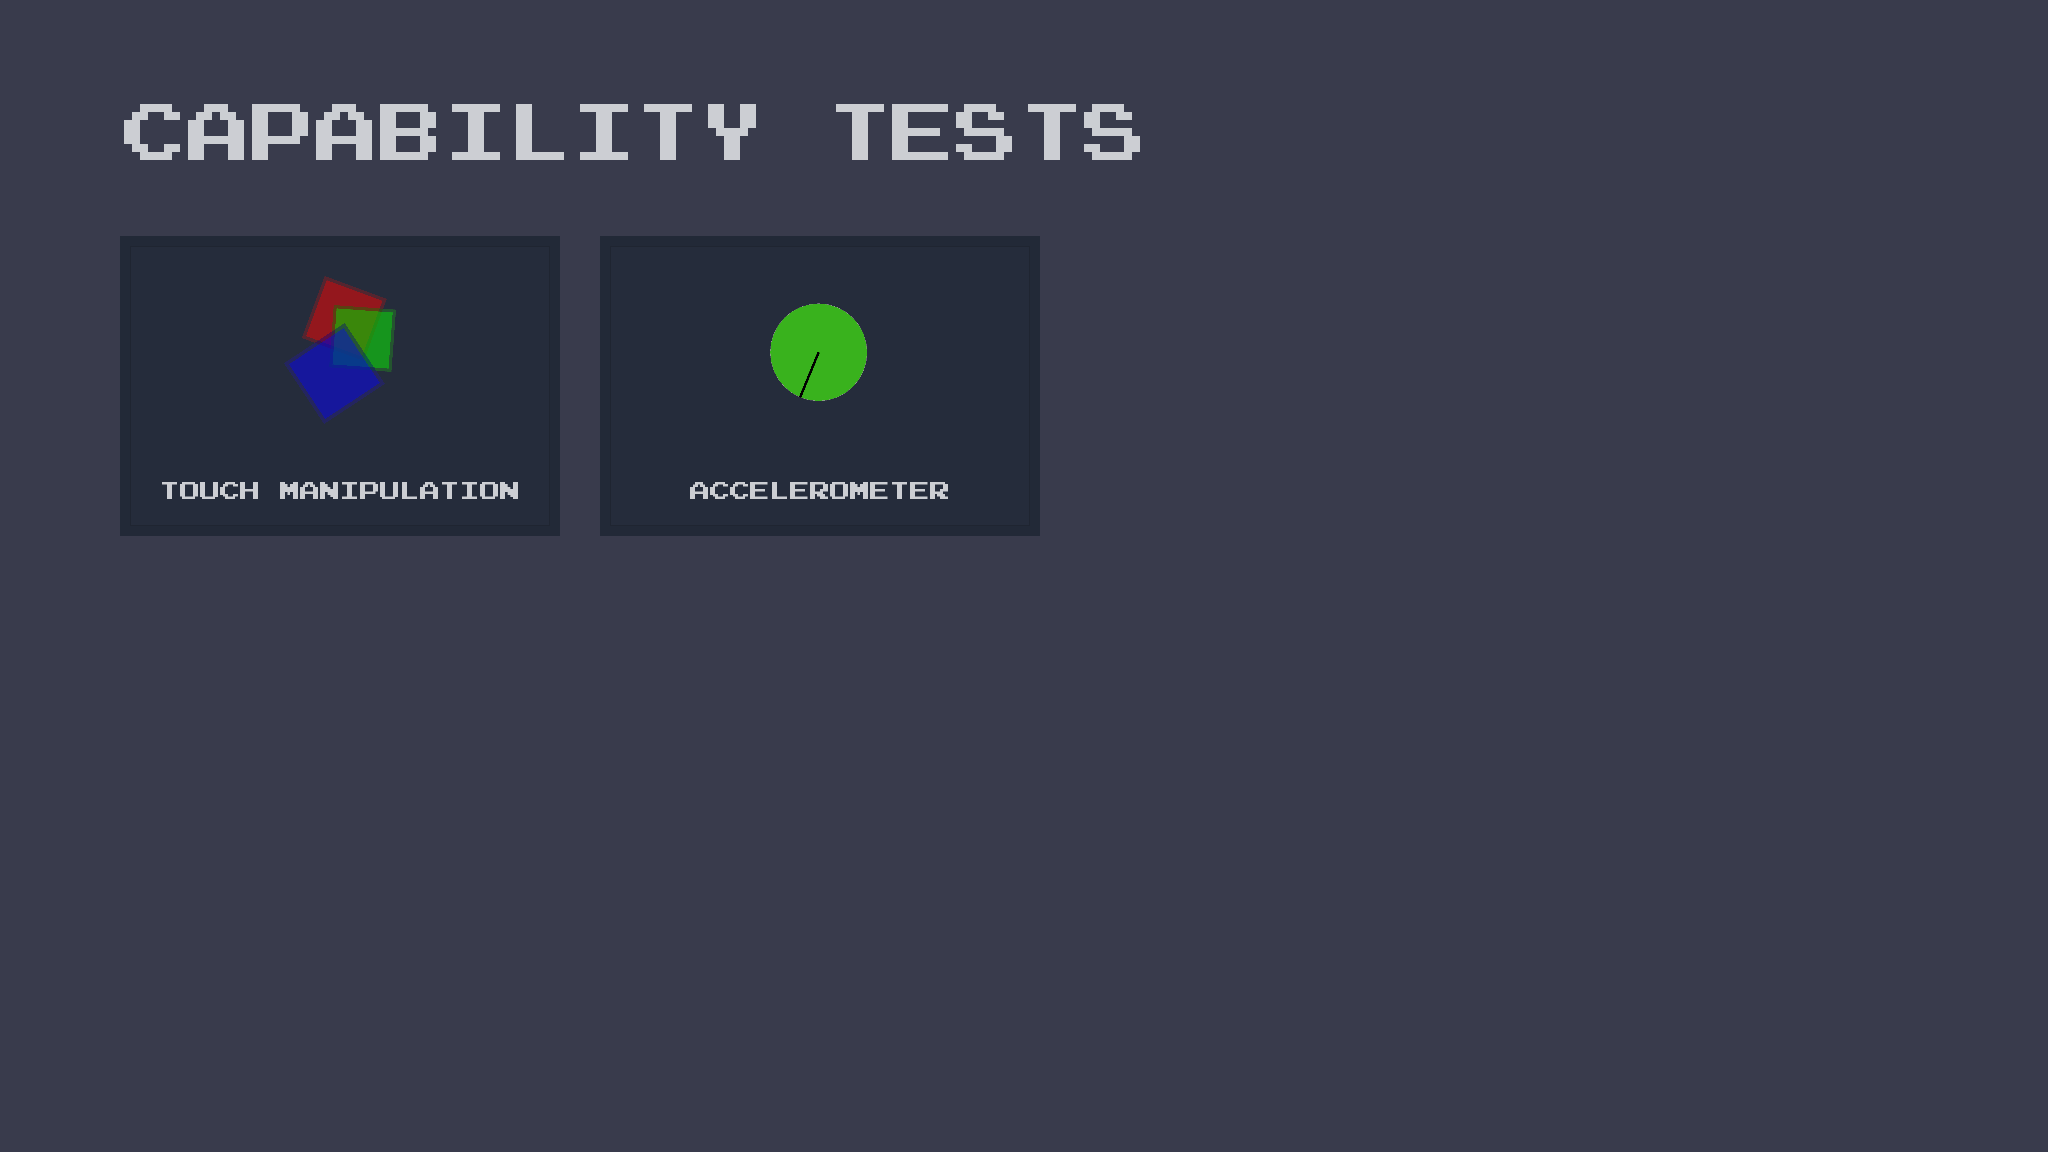
The Completed Menu
After a bit of styling I’m happy with the result. Now I have a basic framework to showcase all the tests in one place that’s easy to extend as new tests are built.
The source code is up on a Gist.

See all the code on my Github Gist
Bon appétit!
Waiter...my Menu is all GUI!